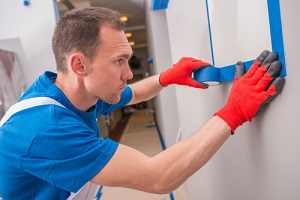
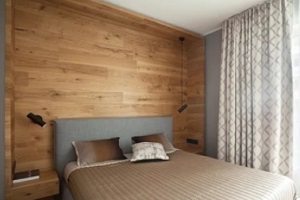
 Wall coverings come in all sorts of designs and materials, and they are a great option for anyone looking to give their space an upgrade. Best of all, they are easy to install without a lot of the hassle that comes with more in-depth tasks like painting.
Here are the essential steps that you should follow to attach your wall covering to any wall or surface.
1. Check the Product
Before installing your wall covering, make sure that you have all of the correct pieces, and check that each section of the wall covering is intact and undamaged. If something is wrong with the wall covering, do not proceed to attach it to your wall. If you choose to install only part of a wall covering, you may later end up with inconsistent and unsightly results.
You should also check that you have all of the necessary tools you’ll need to successfully complete the project. The last thing you want is to find out in the middle of your project that you are missing something important.
2. Prepare the Surface
First, check for mold, mildew and water damage on the walls where your wall coverings will be installed. These may indicate issues that need to be tackled so that the problem does not continue to appear. Then, be sure to thoroughly clean and repair the walls.
This includes getting rid of dust and dirt, sealing stains with a stain killer and patching up any cracks and drywall joints. Next, cover the wall with a coat of primer. Make sure the surface is dry before continuing.
3. Cut or Prepare the Wall Covering
 If you are installing a covering that needs to be trimmed or fitted to specific dimensions, cut the material to the correct size, leaving a few extra inches at the edges. Make sure you are using a knife that is sharp enough so that you make clean, crisp edges and avoid the risk of tearing your wall covering.
To ensure the ideal sharpness, change your blade after every cut. If you are installing a wall covering that does not need to be cut, such as an acoustic art panel, make sure that all of the hardware is unwrapped and ready to hang.
4. Apply the Wall Covering
Apply the adhesive to the wall. Then, attach your wall covering while using proper care and attention to keep it aligned. Use a scraper to smooth out the material and ensure there are no air bubbles, but do not use too much pressure.
Your wall hanging could be damaged or stretched, or the adhesive could be forced out from underneath, potentially causing stains and a less secure attachment to the wall. Wait ten minutes to allow the material to relax before applying the next section in order to prevent blisters, wrinkles and stretching.
While you hang the pieces, make sure they match up to one another and that the colors and shading fit together. Line the patterns up at eye level rather than the floor or ceiling to ensure the most consistent appearance; most people will direct their attention to the wall that is at the same level as their head. After applying your first three sections, make sure everything looks correct before you continue.
For coverings that do not apply to the entire wall area, like art, mirrors or texture panels, step back to check the alignment and positioning. It is best to notice crooked or misplaced features early, before you install the others based on a faulty first benchmark.
5. Finish the Area
 Once all of the segments of your wall covering are attached to the wall, trim the wall covering’s edges so that they are flush with the edges of the wall and the other sections. Again, change your blades often to ensure a clean cut. Next, flatten the wall covering’s seams with a scraper, brush or roller. Verify that everything is smooth and free of air bubbles.
Now your wall coverings are installed! They are sure to enhance the look of your space and make it stand out. If you wish to change to a different style of wall covering, they are just as easy to remove and replace.
One thing to keep in mind is that installing wall coverings is a project to which you should dedicate adequate time towards. It is best if you take a full day to install them, instead of trying to squeeze in the installation around other scheduled commitments. This will ensure that you have the time to create a perfect fit and a pleasing aesthetic.
Trust the Experts for High-Quality Custom Wall Coverings
If you’re ready to get started with new wall coverings of any type, be sure that they are of high quality. The pros at Tree Towns are proud to offer a wide range of excellent custom wall covering options that can be customized to suit your space. Reach out to learn more or to get started.
