 The modern age has seen advancements in essentially all technology, and printing is no exception. Where humans used to copy manuscripts using typewriters (or by hand) and craft images by hiring a painter, now we are able to utilize printers to generate images and text in large quantities every minute.
The art of digital printmaking only continues to be refined each year, and if your home or business needs high-quality graphics, you may be wondering which type of printing will help you achieve your goals. Digital printing and offset printing are the two most common types of image or text-generating machinery these days. For large quantities of products, digital printing is preferred.
Here is an overview of the digital printmaking process, including what it is, how it differs from offset printing, and how your image goes from a concept to a reality.
Is Digital Printing the Same as Offset Printing?
In short—no, digital printing and offset printing are very different methods. Offset printing creates a plate of your image. Think of this like a large stamp that is customized with your design.
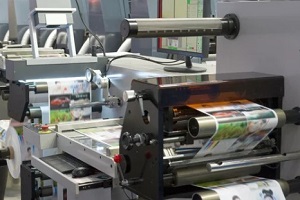
The ink is then rolled over the stamp, which is pressed against the paper or other substrate to create your image. Because a new plate needs to be made for each design, offset printing is slower, but the image quality is excellent. Those wanting just a few prints may select offset printing if they have the time.
However, digital printing is more popular overall. The printer interprets data from an image file and recreates it on a substrate using ink, crafting the image as it goes. This allows for much faster printing, and there is no increased cost for only a few prints. This is why digital printing often takes the lead when people want customized graphics for their home or business.
What Is the Digital Printing Process?
The digital printing process spans from the creation of an idea through to its execution.
1. Creation
Before printing can start, the interested party must develop an idea. They can create their own graphic to print, or they can request help from experts (either custom artists or the printer themselves) to craft a design.
This idea should properly incorporate designs that the individual is legally permitted to use and that incorporate the colors, shapes, logos, or other critical details necessary. Don’t forget to proofread any text!
2. File Formatting
Once the concept has been realized as a visual image, it needs to be formatted. Digital printers typically print at 300 dpi (dots per inch, referring to how much ink is used within each inch of the image).
Your graphic should be sent in CMYK format unless the printer requests otherwise. This allows the printer to scale your image appropriately (compared to sending a .jpeg, for instance, which may lose quality as the image is sized up).
3. Print Head Cleaning
Now is the time for the digital printer to start its work. Experts will clean the print heads so that they stay moist and free from caked-on ink residue. Sometimes, high-quality printing machines can do this on their own.
4. Printer Checking
Next, the pros will check the printer for issues before production begins. They will empty the waste drum, which collects excess ink, and refill the cleaner container as necessary. It is also important that they check the ink temperature to ensure it is maintained at the proper warmth for ideal quality.
5. Pallet Attachment
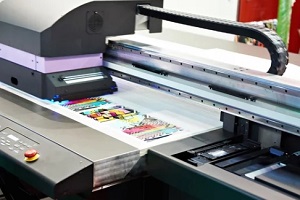
Now, the team will attach a pallet holding the substrate your design will be printed on. Pallets come in different sizes so that images small and large can be printed evenly and without creases. A pallet is similar to an oversized print tray, where you place the paper in your personal printer.
6. Printing
Next, the printer will draw in the substrate, covering it with ink in a side-to-side motion. The printer heads spray the design onto the substrate by interpreting the data from the digital file.
7. Drying
 When the print is complete, the image will still be wet from the ink. It is carefully removed from the printer and shuttled to a dryer, which will bake the ink into the substrate so that it doesn’t smear and adhere correctly.
8. Quality Check
After the print is complete, the team will examine the image to ensure that everything goes according to plan. If the quality is good, the graphic will be prepared for shipment to its buyer.
Get High-Quality Customized Prints from the Pros
Digital printing is a fast, accurate, and affordable way to achieve customized graphics for a variety of uses. The experts at Tree Towns specialize in creating personalized imagery on a variety of substrates, from custom wall art to acoustic paneling and more. Contact Tree Towns to discuss your graphic goals and learn how digital printing can help you achieve them.
